My husband and I just got back from an amazing trip to France, visiting Paris, the D-Day sites in Normandy, Provence and the French Riviera. That’s a lot of territory! I’ve got photo book ideas dancing in my head and it may take more than one book to cover everything. Aside from the history, sights, landscape and architecture, I want to remember the culture and what it was like to be there, people-watching from a sidewalk cafes with my glass of vin rouge (red wine) or cup of espresso.
As I sort and edit our photos, I am getting ideas of how to organize our book. During the trip we tried to take photos of everyday moments… sitting at an outdoor café watching the fashion parade… the French people’s love for their dogs… the patisseries filled with pastries that could pass for works of art… the café crème we became addicted to… the wonderful outdoor markets filled with fresh seafood, cheeses, fruits and vegetables and giant displays of herbs and spices.
So with all the regions we visited, and all those captured “moments” how do I organize our book? I have over a thousand images and will probably end up using around 300 or so. I will take you through my process, with the hope that it will help you with your next photo book, whether it’s a vacation book, yearbook or something else.
Sort and Organize
I’m starting by sorting and organizing my photos and putting the ones I want to use in a separate folder. I copy the images to the new folder rather than move them. That way I always have my originals to go back to in case I accidentally mess something up in the editing.
Edit and Enhance
Next I’ll edit my images using Photoshop Elements. I like to sharpen them and adjust the color and contrast to make them as crisp and vibrant as possible. Remember to edit your photos before you upload them and start on your book. With a few exceptions, online photo services have limited editing tools, usually consisting of cropping and red-eye removal and some tint effects. There have been times when I’ve had to go back to my photo software to edit a photo I had already uploaded, and that’s a time-waster.
Upload Images and Organize Pages
Once the editing is done, I’m ready to upload the images to my photo site. While I use Shutterfly quite often, this time I am using Mixbook because they offer complete customization, the editor is intuitive, and they have a really nice selection of themes and backgrounds as well as attractive fonts.
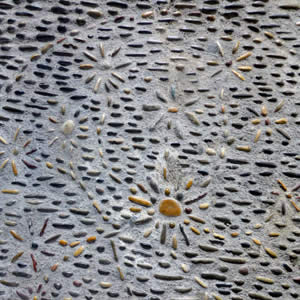
While I really love the Mixbook editor, the one thing it is lacking is an organizer, which would have allowed me to group which photos I want on each page before dragging them onto the page layouts. Customer Service says this is a popular request and something they are working on. (Shutterfly and Picaboo are two services that have layout organizers.) So for the time being, I am organizing them in Photoshop Elements and renumbering them in the order I want to use them. I am also making notes of the “wow” images I want to use as a spread across two pages, as well as earmarking a few images with interesting texture that would make nice page backgrounds. For instance, in the hilltop village of St. Paul de Vence I took a photo of a stone floor (above right) that I knew would make a nice photo background.
Select a Theme
If you want to start with a blank slate and use all your own page backgrounds etc., you can do that, but I rather like Mixbook’s Travel Magazine theme, so I decided to use that as my base and customize it with my own stickers plus some of my images as backgrounds.

Although Mixbook offers a great selection of their own, their online software allows you to upload your own stickers and embellishments, either from scrapbook kits you bought or images you scanned yourself. I scanned our museum ticket stubs from the Louvre and Musee D’Orsay as well as other sights to use as page embellishments.
Tab Sections

Our photos naturally organize into destinations, such as Paris, D-Day sites, etc. Have you seen those color-coded tabbed pages in catalogs or travel brochures? I thought that would be kind of cool to incorporate this concept into my book. With Mixbook I can add a colored rectangle anywhere on the page using their square stickers and then overlaying a text box (you can also use a color-filled text box but that puts the text too closed to the edge). So for the Paris section I will create a tab in red, for the Riviera use blue, for Normandy another color another and so on. This will help organize my book. I think this would be a great idea for a yearbook too.
What about all those food and people-watching photos? I’ve decided to put all of them – or at least most of them – in a separate “French Culture” section. For instance, I will have a page about how the French love their dogs and illustrate it with my pics of pups in restaurants, on the train, even in a woman’s lap while she’s getting her hair done (try that here in the U.S!). I’ll have another page on fashion, one (or more) on food and so on.
Vary the layouts
I like to mix up the layouts so each page is different, they are not all 3 rectangular images on a page, for instance. Some will have a group of smaller images, some pages will have a couple large images, and some with one image spread across two pages. This makes the book more interesting to the eye. See the image at the top of this post for examples.
Journaling
Journaling adds the finishing touch to a travel photo book. Will you remember two years from now where an image was taken or why you included a certain picture? Keeping notes during your trip will allow you to add fun anecdotes and enhance your travel story. I have notes about our experiences, favorite hotels and restaurants etc., that I am incorporating into my book in the form of captions and journal entries.
My book is still a work in progress, but it definitely will capture the essence of our experience and be a one-of-a-kind travelogue that we can look back on with dreams of returning to France.