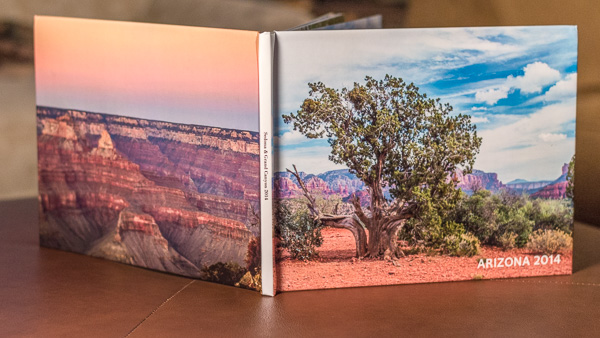
I’ve kind of gotten addicted to making lay-flat photo books, and after returning from a visit to Sedona and the Grand Canyon I couldn’t wait to make one to show off my photos of gorgeous red rock formations and amazing canyon views. Coincidentally, MyPublisher asked me to review their books so this was the perfect opportunity to check out their lay-flat option, and I’m glad I did. In fact, I think my book looks rather spectacular.
My Publisher’s photo books have a clean, elegant design, focusing on the images, so for a classy look that showed off my landscapes, it was a good choice for me.
When you start your book you have the choice of using the Custom Publisher which gives you total control over the design and layout, or the Simple Publisher, which will automatically fill your book and then you can tweak the layout. I’m kind of a control freak, so I used the Custom Publisher so I could lay out everything the way I wanted right from the beginning.
Next, you choose from one of four book sizes ranging from an ultra-compact mini book to a deluxe, oversized landscape book. I chose the Classic Hardcover, 11.25” x 8.75”, priced from $29.99 for the first 20 pages; additional pages are 99 cents each, maxing out at 100 pages.
The Software
Unlike the majority of photo book companies, MyPublisher has free book maker software that you download to your computer, rather than online software. This gives you the advantage of creating your book offline, which will appeal to some people but perhaps not everyone.
What I Liked:
- The Book Maker software is easy to use – you just drag and drop photos onto the layouts and you can customize everything. You can add and remove photo frames, resize and rotate them, and use the eyedropper to create custom font or background colors.
- While the software says that you can choose from 50+ fonts, I found that it enabled me to use fonts I already had on my computer as well, so it greatly expanded my options.
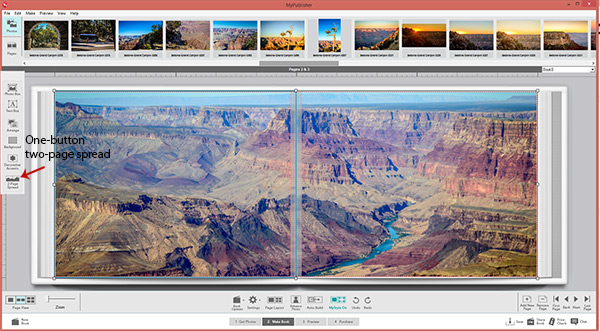
- There’s a one-click button to make an image span two pages. Perfect to showcase landscapes.
- You can use an image for your page background and adjust the transparency.
- Photo and text boxes snap to the grid so aligning is easy and you can drag guides from the ruler so you can align images on the left and right pages.
- There’s a Settings tab where you can choose global elements, including setting a font style and color for your whole book as well as assigning page numbers.
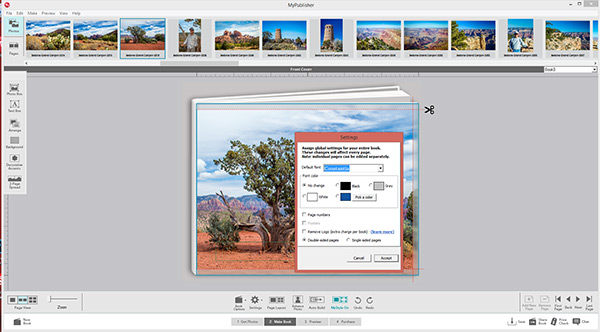
- I don’t think I’ve ever seen this before: you can choose single-sided printing, meaning your images will be on the right side and the left side will be blank. This would be nice for guest books.
- There are some basic editing tools to auto-adjust the tone, crop, fix red eye, auto fit, zoom, move, rotate, and flip, plus 12 Instagram-like filters for photo effects. Not many photo book companies offer even this basic editing, though I always do my editing beforehand in Lightroom.
- You can change your book theme, cover style, and size at any time during the book creation process.
- There’s a variety of book themes including travel, baby, kids, vintage and wedding themes in addition to a solid color and textured backgrounds. There is also an assortment of decorative accents. I chose the Just Photos theme which, not surprisingly, focused on showing off my photos.
- The software gives you a running cost of your book in your chosen size and cover. Of course, this doesn’t include all the optional extras that you can add during the ordering process, like lay-flat pages and paper upgrades – more about that later.
Features I’d Like to See
- Having to install the bookmaker software on your own computer may not be for everyone, though it’s not a huge file (about 30MB). It would be nice if there was an online alternative.
- More book themes/templates. While there is a variety of themes and embellishments as I mentioned above, you won’t find an extensive collection of ready-made, scrapbook-style pages. On the other hand, if you get overwhelmed with too many choices and want to keep your design uncomplicated, then the simple but elegant templates will work well for you, as they did for me. You do have the ability to create custom layouts in Photoshop or another program, export them as jpegs, and add the finished pages to your book, and you can also upload your own background papers in JPEG format.
Optional Lay Flat Pages
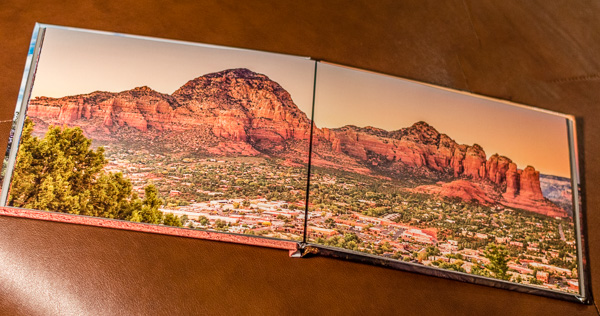
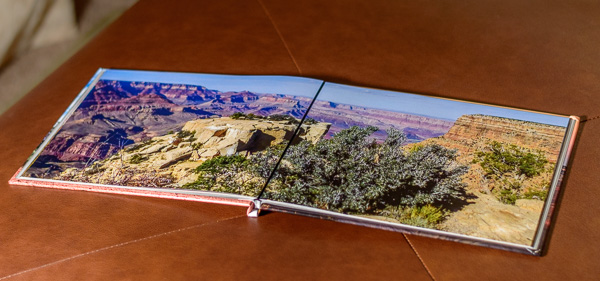
Since I wanted to show off Grand Canyon and red cliff panoramas, I chose the Lay Flat Pages upgrade. This means the pages lay completely flat when opened, there’s no curve or curl. MyPublisher uses hinged binding with a small gutter (about 1/16″) down the center. You can see in this photo that there’s a narrow gap in the middle of the spread but nothing gets lost, as with regular binding.

Rather than being a completely different product, their Lay Flat pages are offered as an add-on during the order process for a straight rate of $15-$45 depending on the book dimensions, not the number of pages. For my Classic Hardcover 11.25 x 8.75 it cost an extra $25. This can be a real bargain if your book is 80 pages, but pricey if you’re only making a 20-page book. This add-on is an important distinction: most other companies offer their lay-flat book as a premium book style that’s made differently and priced differently from the get-go. For example, a lay-flat book at a couple of other prominent companies can set you back about $80 to $90 for just 20 pages. I have a detailed post about lay flat photo books, including more about MyPublisher’s, which you can read here.
Paper Choices
When it comes to paper, MyPublisher offers some interesting options. You have a choice of the standard Superior Paper – 120# with a Satin or Matte finish. The Satin is a semi-gloss, which is good for landscape and travel photos, while the Matte has a slight texture and slightly mutes colors for a softer look. This would be nice for family portraits. There is also a Deluxe Paper, weighing a hefty 170# at a $3.99 upcharge, that’s available in Satin or Matte. I decided to try out the Deluxe paper in the Satin finish.
Super Gloss Printing
You can also get Super Gloss Printing (an extra $10), which has a scratch and spill-resistant coating that makes the pages a little thicker and sturdier. It seems to me that if you picked Matte paper the Super Gloss printing will cancel that out, so keep that in mind. I wanted to try out the Super Gloss to see if it was worth the extra cost, and I was not disappointed. It really makes the colors pop, as you can see in the image below.
Book Sizes
My Publisher offers four book sizes: 3.5″ x2.75″, 7.75″ x 5.75″, 11.25″ x 8.75″, and 15″ x 11.5.” The Deluxe Hardcover is a massive 15 inches x 11.5 inches, is regarded as the biggest book available in the custom-publishing market. This would make it ideal for wedding albums. Unfortunately, there is no 12×12 square book at this time.
Cover Styles
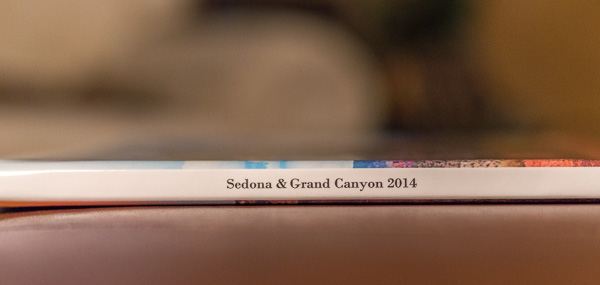
A Linen cover is standard and you can upgrade to various options: The Photo Finish ($6-$10 extra) prints your photos directly onto the hardcover and it’s the option I chose. The removable Book Jacket ($6-$10 extra) offers customized front, back, spine, and inside flaps. It’s also laminated for protection. Hand-stitched Spanish leather covers are available in black and tan for an extra $20-$30. The linen and leather covers have windows to show the first-page photo. There is also a paperback pocketbook cover.
How Did it Print?
The color reproduction for my book is beautiful. I mean, wow! The colors are right-on, just the way they looked on my screen, with rich, vivid colors and good blacks. I’m really glad I got the Super Gloss printing. The pages feel sturdy and there is a bit of a shine to them without being glary. They feel like they will stand up to time and fingers turning pages. They give the colors an extra oomph without over-saturating. I think it’s worth the extra 10 bucks, especially for landscapes. For portraits or weddings, you might want a softer look, such as regular printing on matte or satin paper.
Pricing
So to recap my book features, I created a 32-page Classic Hardcover 11.25 x 8.75 book with Photo Finish, Lay Flat Pages on Deluxe, and satin-finish paper with Super Gloss Printing. In other words, all the optional extras so I could give them a spin. My book came to $86.86 before shipping ($10.99), plus sales tax. Without the lay-flat page and paper upgrades, (just the hardcover with image wrap) it would have cost $47.87, which is comparable to most major companies; actually, it’s less expensive compared to some other well-known companies. There are also weekly sales and coupon codes that can substantially bring down the cost. My best tip is to make your book, leave it in your cart and then check for sales to take advantage of the best price.
Click here to go directly to MyPublisher
Have you made a photo book at MyPublisher? Share your experience in the comments below.
I recently bicycled across the USA with a friend. I also recently created several photobooks for my mom and friends. I used My Publisher for the books and everyone who saw the book was blown away with the concept. So when I decided to make a photobook and of my bicycle trip and create 20 copies to give to friends (20 pages each), I went through the ordering system and with discounts my price was about $120 for the 20 books (I don’t sign up for upgrade features). But then I found that My Publisher wanted to charge me $103 for shipping (Priority mail at the post office would be less than $20), I bailed out of the process.
It took me a few days to learn how to use My Publisher (it is easy to use) and I do have an investment of time and energy into their system, but I don’t like to feel like I am getting ripped off. So I am switching to something else (perhaps Blurb).
That’s too bad about the shipping fees, Bob. Blurb has a good product. Their shipping for 20 books is about $38 standard shipping, exact price depends on your zipcode. But even better is Adoramapix – they give free shipping on orders $39+ and I love their books. I have reviews of both services – Blurb – http://www.digitalphotos101.com/blurb-photo-books-hands-on-review.htm Adoramapix – http://www.digitalphotos101.com/blog/a-review-of-adoramapix-layflat-photo-book/ and if you want to save even more, I post the current coupon codes here http://www.photocoupondeals.com/weekly-promos/
Good luck with your book.