
Simple Tips for Taking Better Photos
I’ve got a few simple tips for you that will instantly help you improve your photos. It can be as easy as making sure you have your camera set to the right resolution for the image size you want, to composition suggestions to help you frame your photos in a more interesting, eye-catching way. So let’s dig in.
Setting Your Camera for the Right Resolution
It all starts with the resolution or how many pixels your photo is. The bigger the prints you want to make, the more pixels you need to make sure your photos come out crisp and sharp at larger sizes.
As a rule of thumb, set your camera to the highest resolution to ensure you can print your photos at the size you want. Many online digital printing services post image resolution charts to assist you in getting the best possible prints. Nation’s PhotoLab has a helpful Pixel Chart — select the print size you want and it will display the bare minimum resolution and the number of pixels needs for the best quality. Below is a general guideline for popular print sizes.
| Print Size | Minimum Resolution | Recommended Resolution |
|---|---|---|
| 3.5×5 | 438 x 625 pixels | 1050 x 1500 pixels |
| 4×6 | 500 x 750 pixels | 1200 x 1800 pixels |
| 5×7 | 625 x 875 pixels | 1500 x 2100 pixels |
| 8×10 | 1000 x 1250 pixels | 2400 x 3000 pixels |
| 16×20 | 2000 x 2500 pixels | 4800 x 6000 pixels |
Say Goodbye to Red-Eye
There are several ways you can reduce the red-eye in your photos. To start, make sure you use your camera’s red-eye reduction feature. Turn on more lights or change the angle of your photo. Try to photograph your subjects with their shoulders slightly turned, not directly head-on. If you still end up with red-eye, use the digital photography red-eye correction tool that comes with online photo services such as Shutterfly.
Photo Composition Tips
What will set you apart from other photographers is how well you compose your pictures. Here are some tips:
- For more flattering portraits, try to photograph people slightly off-center with their shoulders slightly turned, not directly head-on.
- Make sure the sun is BEHIND you.
- Use flash whenever possible, even in the daytime.
Follow the Rule of Thirds
Divide the image into three sections. Placing your subject off-center creates an interesting, dynamic image. Imagine your photograph divided into three horizontal and vertical sections. To compose a well-balanced, off-center shot, place your subject near the intersections of the imaginary grid lines. This is called the rule of thirds.
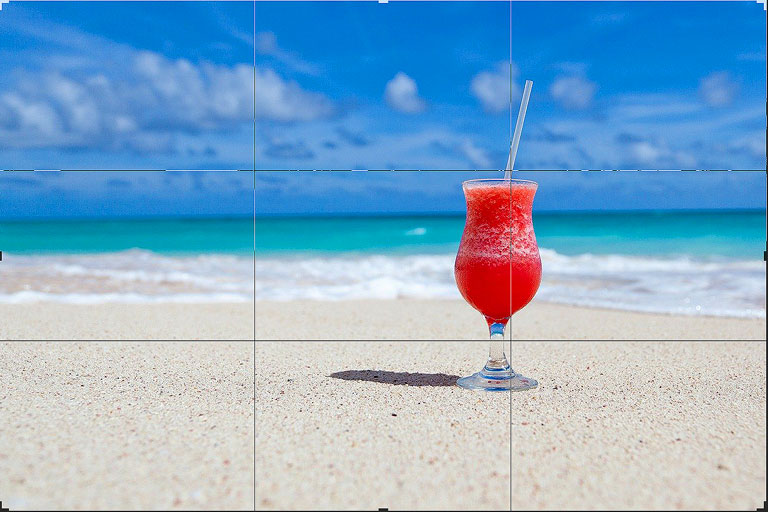
Use the rule of thirds to create dynamic portraits: Emphasize a dramatic sky by placing the horizon along the lower grid line.
With a moving subject, use the rule of thirds to leave space for the subject to travel into.
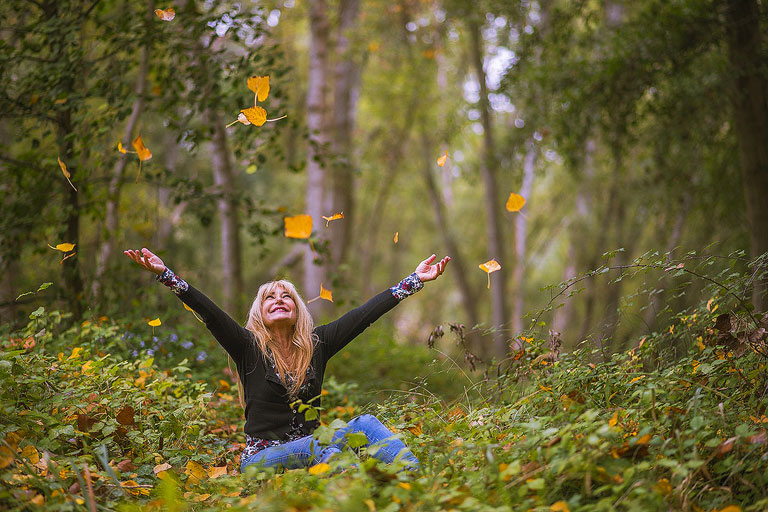
Get Close
Your subject is interesting, so get close to it. Don’t let your pictures suffer from the “Grandma at the Grand Canyon” syndrome, with a tiny subject and lots of boring, irrelevant space.
Try Unusual Angles
Be bold! Try turning your camera to 45 degrees before snapping a picture. Or instead of snapping it from eye level, kneel down or lie on the ground to get a more interesting shot.
Frame Your Subject
Try framing your picture with foreground objects to add depth to the image.
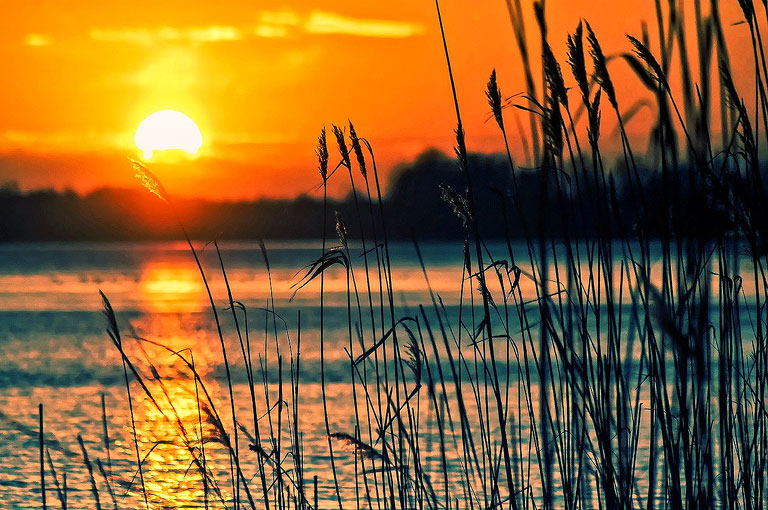
Pay Attention to Lines
Curves, straight lines, and diagonals add energy and movement to your compositions. Let roads and rivers draw the viewer into the image or lead the viewer’s eye in a specific direction. Watch for natural geometric patterns and place yourself at an interesting angle to them.
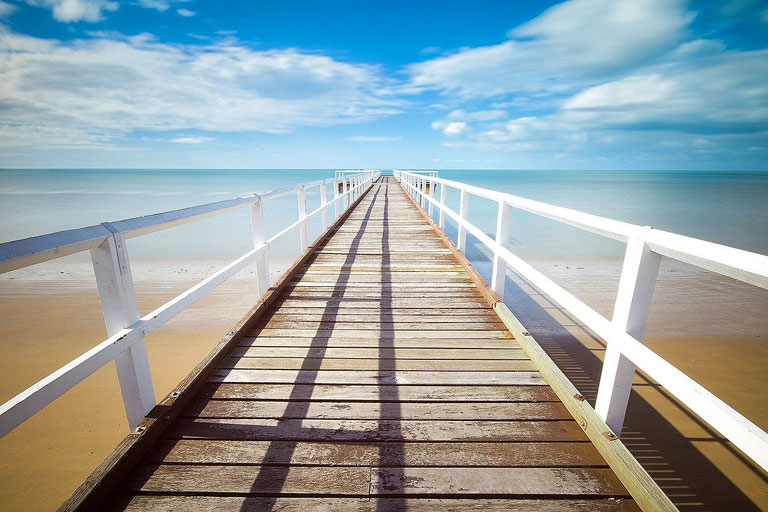
Don’t let lines unintentionally throw your photo off balance. When you shoot the horizon or a building, keep straight lines level—unless you’re shooting at a dramatic, intentional angle.
Keep the horizon level. If your horizon is crooked, it’s easy to correct in your photo software, such as Adobe Lightroom Classic.
Avoid Cluttered Backgrounds
Don’t let a cluttered background overwhelm or obscure your subject.
Move around, or lie down, to get a clear shot at your subject without the distractions. A cluttered background can obscure your main subject. Reposition your subject or yourself
Watch for “Mergers”
As you position yourself to avoid a cluttered background, also look out for trees, lamp posts, and other background objects which might merge with your subject in unfortunate ways. Don’t let a tree grow out of your subject’s head. Reposition your subject or yourself to avoid mergers.