We all have good intentions when we take scores of photos, whether for events we chronicle with our camera or just for fun on our phones. The problem is unless we organize those pics and create a reasonable plan, often the pictures end up sitting in our camera, smartphone, or computer in limbo.
Organizing is paramount to being able to find anything in our constantly growing collections, yet so many of us either lack this skill or just plain don’t find the time to organize. I was thinking about this the other day when I looked at my own ever-larger collection of photographs. So, I thought it would be a good idea to share my organizing system with the hope it can help others.
Download and Consolidate Images
In our world of smartphones, tablets, laptops and desktops, Facebook, Instagram, etc., chances are we have our photos here and there and everywhere. So the first step is getting everything in one place. Make it a point to download your photos to your computer at regular intervals. By doing this, the task doesn’t get overwhelming, plus you will never have to worry about losing photos because your card is full and you need to take another pic. Or worse yet, accidentally delete one of your best shots because you’re in a rush.
Group By Year and Month
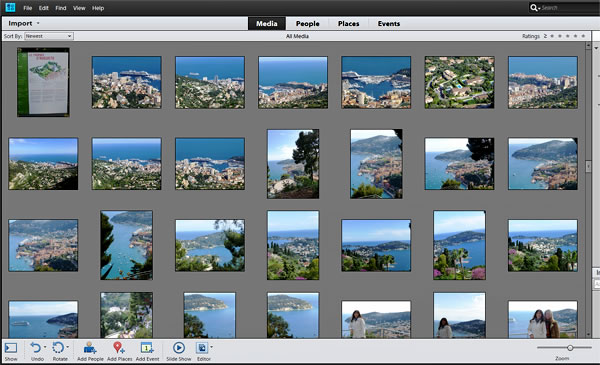
Once you have the images safely stored on your computer, it’s time to organize them. I start by putting all images into a folder by year then making subfolders for each month and dragging the pictures into the appropriate month. You may want to make additional subfolders within each month by event, such as birthdays, vacations, etc. For example, if you have a Mac, iPhoto enables you to organize images by event and date. You can also do this in Photoshop Elements’ organizer.
Name and Tag
Next, name and tag your pictures so that you can find them easily in the future. If you have thousands of images with names like IMG_2888967 and similar, how are you ever going to find what you’re looking for? Nothing is more annoying than trying to find that one pic you need amongst a sea of numerical file names, ‘cuz I’ve been there.
Most photo software programs have batch renaming which makes the process simple. External image organizing and editing programs like Adobe Photoshop Elements and Corel PaintShop Pro
work great for this. If you don’t have a special photo editor, Windows Live Photo Gallery, and iPhoto, will batch rename and tag your image as well.
Tagging Trick
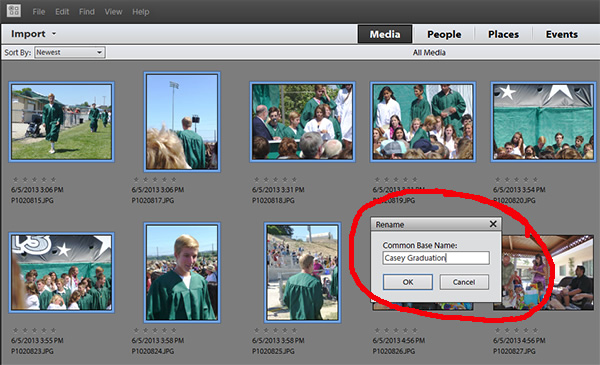
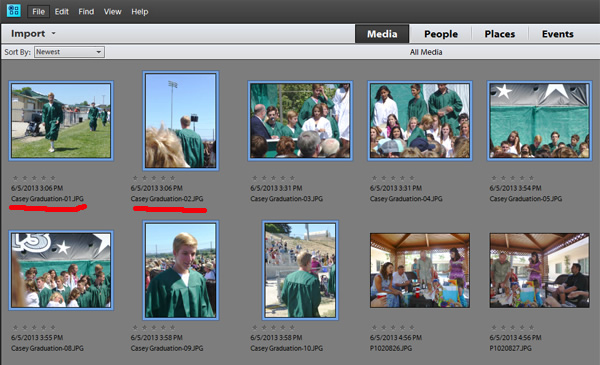
Here is a tip on quickly renaming a bunch of images that work in programs like Windows Live, iPhoto, and Photoshop Elements: Select the images you want to rename and click on “rename.” Type in the name you want for this group of images then hit enter. I know this seems a bit scary because logic dictates that only the first image will be named and the others will be deleted as duplicates, but this is not the case as you can see below in this example from Photoshop Elements. All the images will be re-named with the main name and a number after them.
 TIP: If you have a giant backlog of unorganized images, TAKE YOUR TIME or you will freak out and give up. I suggest going one month at a time and working on it maybe in the evening after the kids are in bed.
Cull, Cull, Cull
Now your images are all organized, named, and tagged. But before you go any further, get rid of the obvious bad photos and multiple duplicates. If the pic cannot be edited or it is far too blurry to be usable, just delete it. Be brutal about this, don’t be afraid to delete unwanted photos. If it’s not usable, why keep it and take up space? You should also get rid of identical shots. Do you really need 20 nearly identical photos of your new bathroom remodel? Choose the absolute best one or two, perhaps a vertical and horizontal of the same subject and delete the others, so that you are not handling the same photos over and over again.
That reminds me of a quick tip when you are taking photos. I recommend snapping multiple shots of your subjects at different angles so that you can choose the best later on. Don’t depend on only one shot or pose. Take images vertically and horizontally to give yourself more options later in case you want to use them in a project.
Back Up on CD/DVD, External Drive or to a Cloud Service
To be absolutely safe and sure that your pics won’t be lost, back them up immediately. Don’t wait until you have so many photos that the job is cumbersome and time-consuming. Plus, if you wait, something might happen to your computer and all your organization has gone to waste. Always have blank CDs or DVDs, so that you have no excuses not to do the backup. If you prefer, you can use an external hard drive to store the backups.
Online storage and sharing services also provide you with convenient and easy ways to keep your photos accessible and safe. In fact, I think it’s preferable to have a copy of your images stored off-site in event of some kind of disaster at home. Look for sites such as Flickr, PhotoBucket, and SmugMug. Some services, like Flickr, offer free accounts and others offer several cheap yearly plans. I particularly like Smugmug and besides, their newly-redesigned site is just gorgeous. Read my post comparing various popular photo sharing sites for more information.
Reformat Your Memory Card
Once the photos are on your computer and backed up, it’s time to remove them from your memory card. Unfortunately, many people do not realize that using the delete function alone is not the way to properly remove photos. To improve your card’s performance and prevent it from wearing down, you must format the card every time you want to erase any images. Your camera will have the format feature in its navigation.
Fire Up Your Image Editor
When you decide upon a project, such as a photo book or greeting card, or you just want prints of your favorite images, I recommend using your own preferred editing software for making any enhancements. If you are using an online photo service for printing, be aware that, with a few exceptions, most of the editing tools these companies have limited features and it will be slow going if you need to edit a lot of images. You can make your photos pop by using programs such as my two favorites, Adobe Photoshop Elements and Corel PaintShop Pro
. If you don’t have a dedicated photo editor, iPhoto and even Windows Live have some fairly decent, if not advanced, editing tools.
Tweak your images with your chosen photo software by sharpening, enhancing the contrast, cutting out junk, and bringing out the important details. Most software offers automatic adjustments as well as tools for precise control. Once you’ve edited your images you’re ready to share them or use them in a creative project.
Printing
It can get costly to print hundreds or maybe thousands of photos all at once, so if you have a huge backlog you could upload and print a couple of months worth of photos at a time. I like using companies like Snapfish or Shutterfly
for this because they offer frequent promos; Snapfish sometimes offers penny print deals or other deep discounts, for example, and both often have free shipping deals, usually for orders over $30. When you get your photos, organize them in envelopes with the date on the cover and store them until you are ready to put everything in albums. Better yet, after uploading your images to your favorite photo service you can create one or more photo books with them. Again, you can get some pretty good discounts to help bring down the cost. I keep track of the latest coupon codes on my deals page, which you can find here.
I hope this helps! Let me know if you have any questions and I would love to hear how you organize your photos.