

Do you have a bunch of big, heavy photo albums with pictures stuffed in the sleeves? I have dozens of the things. Before the era of digital photo books I took lots of photos during my vacation or special event like a party or family gathering, printed them and put them in those plastic the sleeves and that was the end of it. I never gave a thought to story telling. I didn’t give a whole lot of thought to organization other than putting them in chronological order. It sufficed, but it wasn’t especially interesting.
Since the advent of online photo book software some years ago, I have gotten into making photo books and have made quite a few. I’ve learned that with a bit of pre-planning BEFORE I even start taking pictures, I can tell a story with my photos; I use my pictures to illustrate or document an event or occasion in storytelling fashion. It makes my books much more appealing and engaging to the viewers, they are not somewhat random images I dropped on the page. It’s really not that hard to do; the key is a bit of planning. Here is how I do it.
Plan Ahead
If there is a particular event or time period you want to document, such as a wedding, a school year or summer vacation, take a little time to think about what story you want to tell and what types of shots you will need. You don’t want to be putting your book together and realize you left out something important.
Identify the Important Elements
Like most stories, a pictorial story should have a beginning, middle and an end. The stuff in between will flesh things out and add richness and detail. There should be a logical flow. For example, an opening shot of a vacation book could be of your family at the airport ready to board your flight or if you are attending a wedding, it could be the bride alighting from the car in front of the church.
Make a Shot List
Just like a professional photographer would do it, make a list of all the important don’t-miss shots. For example, I made a book with photos I took at my cousin’s wedding. I made sure I had photos of her walking down the aisle, the kiss after the bride and groom said “I do,” cutting the cake, throwing the bouquet, etc., in addition to fun candid shots at the reception. So for your photo book, jot down a list of the types of shots that you think are important. Think about taking photos from different angles, high and low, etc.
Time to Take Your Pictures
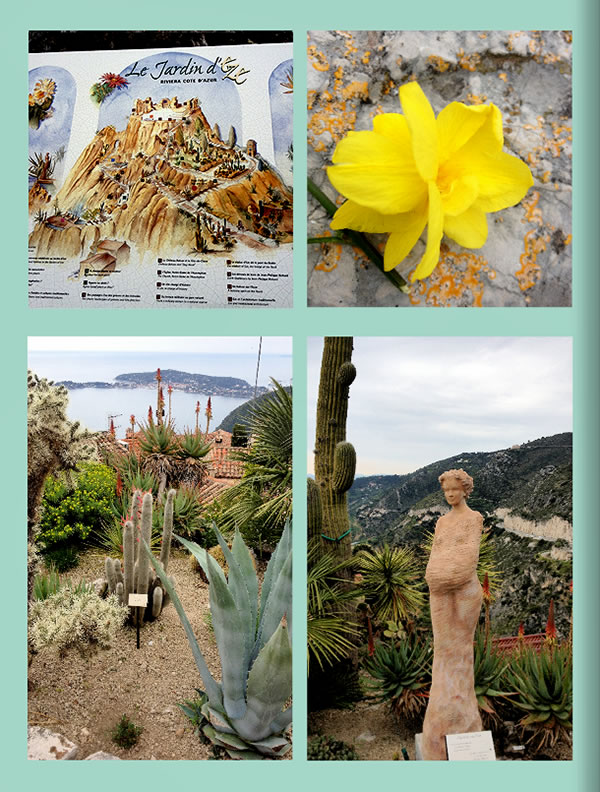
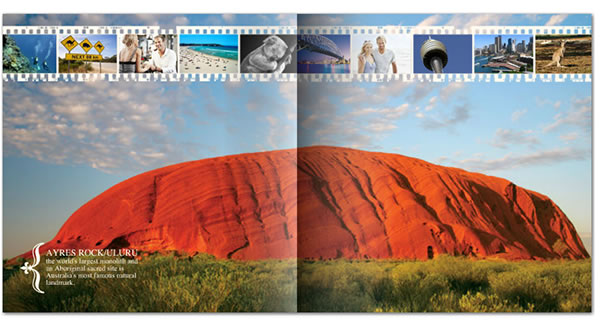
Get your opening shot. This is often called the establishing shot because it sets the stage for what is to come. It could be a close-up of your cruise ship with you and your family in the foreground, a significant sign or building or some other subject or item that acts as a title.

Take your beginning shot. This is something that used to confuse me because isn’t that the same as an establishing shot? Not exactly. Think of the establishing or opening shot as the title page and the beginning photo as the start of a sequence of images. Going back to the cruise ship reference, if the establishing shot is your walking up the gangway, the beginning shot could be on deck toasting your bon voyage with an umbrella drink.
Shooting More Images
You want to take quite a few photos, more than you think you need. If you are trying to develop an idea you will probably like a sequence of 3-4 shots to convey what is happening. Look for action as well as images that set the stage or convey the atmosphere surrounding the event. Keep in mind that for the end result you will want to use just your best shots and not include everything but the kitchen sink. I think it looks much nicer to use just a few larger images on a page rather than a bunch of smaller ones.
Take a variety of shots including lots of close-ups. Details make things look interesting and provide perspective. Mix up vertical and horizontal shots. If all your photos have the same orientation and same angle it looks kind of static and less compelling.
Final Shot
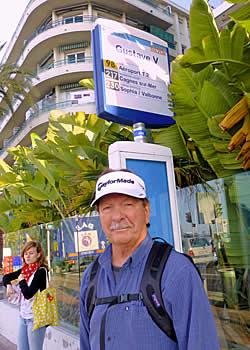
Don’t forget to end your story. It could be the bride and groom pulling away in their car after the reception or your beautiful, your newly finished kitchen with all that those shiny stainless steel appliances, or the cast of your child’s school play taking their final bow. When my husband and I were in France, I took a picture of him at the express bus stop in Nice as we waited for our airport bus for our return home.
Your Photo Book Page Layout
When you are ready to create your photo book, think about the photographer’s “Reverse S” method. This is a technique that encourages the eye to start in the upper left corner and wander down to the right and then a photo draws the viewer back and up to the left. To get this kind of layout, it’s key to have a good mix of vertical and horizontal images and photos taken at different angles so you can make this work.
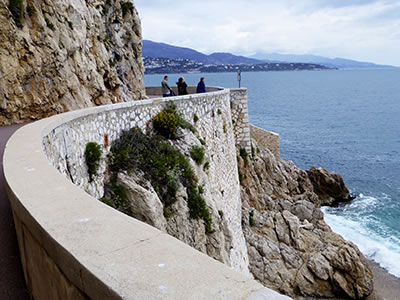
If you are photographing landscapes, look for an s-curve such as a river curve, a road, a coastline, a wall, etc. If you can pull this off it will make your book hold the viewer’s interest without their eyes going off the page.
If this layout concept is sounding way too complicated for you, don’t stress about it. Most photo services, such as Mixbook, My Publisher and Shutterfly
(my personal favorites), have an excellent assortment of ready-made templates and page layouts that will do the work for you, and all you need to do is drop in your photos.
The takeaway is to plan your shots, take more than you think you need, and only use the best. Vary your layouts on each page for more visual interest. Also, be sure to add appropriate captions and text as needed then print and enjoy!
Related Posts
Making the Ultimate Travel Photo Book: Incorporating Your Mementos
Creating a One-of-a-Kind Vacation Photo Book That Tells Your Story